In today’s video, I’m going to be introducing something that’s a little bit different, It’s a new playlist I like to call Deskside Diaries. When I was thinking about what kind of content I wanted to create and share in the vast world of YouTube, fashion and beauty were natural choices. But so many of you want to know how I do it ALL! So in an effort to share a little bit of behind the scenes magic, Deskside Diaries was born and today I’m showing you a few tips on how to create the perfect flatlay.
Now that you’ve watched the video, you should have a better understanding on how I like to find my objects and compose them in the frame so it feels organic and not staged. Now, about those Apps! The true formula behind making your Instagram feed GOLDEN! From flatlays to the perfectly edited OOTD, I like my photos to have a sense of realness to them. I admire feeds that have a certain “tone” to them through using filters by my approach has always been natural! That way your feed will feel cohesive and will look gorgeous, like your favorite fashion bloggers 🙂
Are you ready? Below is a list of my go to photo editing apps and how I use them!
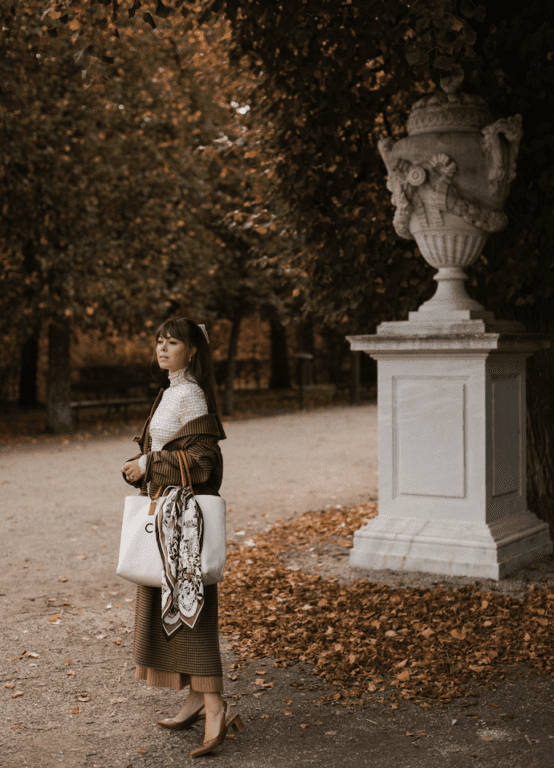
First and foremost, I actually have stopped taking my photos in a horizontal or square frame. Ever since Instagram has allowed us to use vertical images, I’ve opted to feature mine in this format (for the most part). When scrolling through your feed, vertical images have higher engagement because they are larger for the viewer and take up more of the screen – visually, it looks better! But that’s just my humber opinion.
Drum roll please! I present to you my five go to photo editing apps in addition to the order in which I use them (this is a key in the editing process, your steps!). It’s important to use them in this order because you want to get the base of your photo (the color and tone) perfect before additional editing happens. Read on to see what I’m talking about!
SNAPSEED
Without compromising the integrity of your images size, Snapseed is my favorite because allows you to edit everything from brightness, contrast and everything in between in very small increments to get the precise tone you are looking for. I alway shoot images a little darker than I want because you can always brighten but once you loose that details in a blown out photo, there’s no way to recover it. So shooting a little darker maintains detail which is so important! I love upping the clarity and sharpness. This always give my photos that crisp look!
VSCO
I used to use VSCO filters for everything, until I learned that it makes your images look pixelated. Apparently it shrinks your image size so it looks more grainy, never met a grainy photo I liked. What I use VSCO for now is purely for tint. I like to put a pink tinge on my photos so I up the pink “tint” in here. Sometimes I’ll add a little sharpness here too but whatever you do, DON’T crop in VSCO, it shrinks the image size compromising pixelation. The best place to crop is after you are done editing everything and the photo is saved to your photo album. Crop with the editing app that comes with your phone.
FACETUNE
I first discovered Facetune as a tip to use for whitening photos which is absolutely true! I hate the way yellow lighting looks in images so I will use this took to take the yellow out of almost everything – a wall, rug, background lights – you name it. I also love to use this to lightly even out skin tone if I need to but it’s really easy to over due that effect and is always so obvious when people use it – be careful when using that tool for sure. I also love this app for it’s precise sharpening effect – you can pin point exact points to sharpen instead of doing the whole image. When I do a selfie or a close up of food or if I want to make the print pop on a dress, I use the sharpening tool to define little elements. I really love using it in my eyes, it makes your eyes look bright and glowey!
RETOUCH
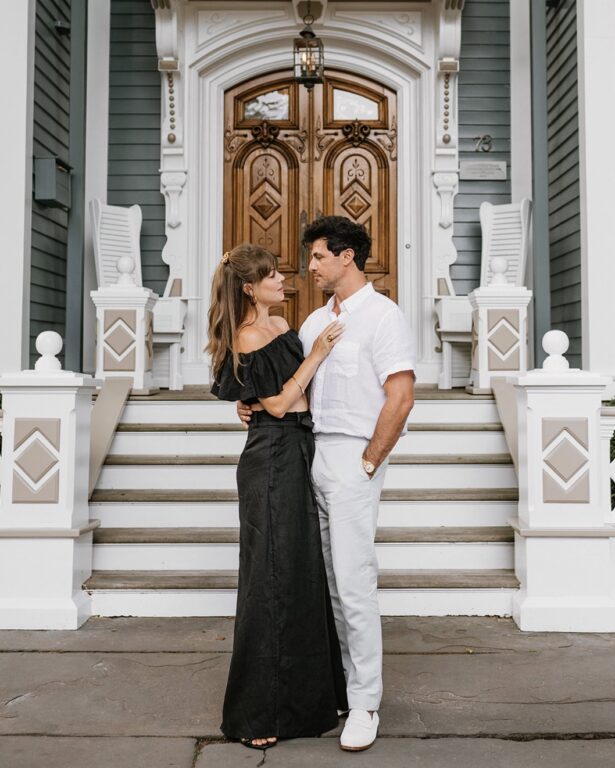
We’ve all had that perfect image get messed up by something in the background – a trash can, person walking through, anything. Retouch is kind of tricky to navigate but once you master it, can literally remove the most insane things from background. In this photo, I was actually able to remove people off of the beach so it looks like we were there alone. Nope, there were like six people in the background! LOL!
MAKEUP PLUS
Ok, so I just discovered this app and it’s kind of dangerous because it’s easy to get carried away. I find it to be more comical than anything really but works for close up mid-body shots where your face isn’t too tight in the frame. It’s the most detailed app, allowing you to literally put a lip stain on or a blush on and manages to look completely natural. When I was shooting this photo, I forgot to put a lipstick on so I used this app to give my lips a orangy tiny. The best part is that you can up the intensity of the color, so if you want just a little hint you can achieve a somewhat natural look.
So there you have it! Tricks of the trade! All things I’ve learned along the way and definitely populars among my peers in the industry as well. It’s funny sitting down at blogger lunches or dinners. Everyones always talking about the latest apps and what new favorites are. So I thought it was about time I shared them with each of you!
And please, don’t forget to SUBSCRIBE to my YouTube channel for more insider tips!
Video by Tim & Co. Productions.