


If you read last week’s new column called NYC & Me and liked the idea of ongoing series on Margo & Me, then I have a treat for you today. 2018 is the year of series on this site and really connecting to you lovely readers. As such, I wanted a place to showcase the products that I’m using and loving each month. More specifically, the ones that aren’t part of a collaboration. Now, don’t get me wrong, I’ll never highlight something that I don’t truly approve of (sponsored or not), but I know there’s a lot of #sponsored content out there. And sometimes as consumers, it might be overwhelming to know what influencers are using in their daily life that they aren’t paid to promote.
SO! I’ve come up with this series, “The #NotSponsored Series” to highlight the products that I’ve picked up on my own – and that I’m obsessed with. An authentic look at the products I’ve spent my hard-earned dollars on and keep coming back to. To kick off the series, I’m starting with something I’ve gotten tons of questions about: my hair!
While a few things became infinitely easier when cutting my hair, a few things got a little bit more challenging, too. Case in point: learning how to style and curl my hair properly without looking like Little Bo Peep.
If there’s one question you guys have been asking since the chop, it’s how to style. Now don’t worry, this week I am shooting a new YouTube video on how to style short hair that I will share in the upcoming weeks! But as a teaser, I wanted to send through a few products I’ve been using, while explaining how they’ve made it a little easier to get ready in the mornings.
Side note, for those of you wondering if these products or steps will work for you hair too, I thought it was important to share my hair type. Since I don’t dye or color-treat my hair, it tends to be a lot more slick. I have thin hair but a LOT of it. I have a natural wave to my hair, but not in the cute way – more in the messy, frizzy way. Without further adieu, here are my steps to taming that mane.
STEP 1: WASH
I quit conditioner. I know, shocking! But I haven’t used conditioner is months. I found that it was leaving my hair too slick to style. I needed some grip and grit to get those waves to curl, and ditching the conditioner gave me exactly what I needed.
For shampoos, I’ve been switching off between a few. My favorite is Oribe, just because it actually smells like heaven. (Side note: I also use their body wash because it smells just as good). I also love using L’Anza’s White Tea Shampoo. Again, it smells divine (can you tell I’m a scent driven?) and it’s sulfate-free so it’s extra gentle. A few other favorites are Aveda’s Rosemary Mint (for obvious reasons) and, of course, Nexxus’s Keraphix,which I’ve shared before and is great for damaged hair.
STEP 2: PREP
I never did this when I had long hair so this is a completely new routine for me when I have damp hair. When I had long locks, I used to live off It’s a 10 Leave-In Miracle Conditioner because it was great for tangles, but since that’s no longer a problem, I reach for something that will give me more texture like Aveda’s Texturizing Cream. I also like using R+Co’s Thickening Spray for that extra volume I so dearly love.
STEP 3: DRY
My preferred way to dry is by air. Trust me, it’s far from pretty when it dries naturally, but it’s more about the texture I achieve from air drying. As I mentioned, I will use Aveda’s Texturizing Cream before it dries.
When I’m in more of a rush, I’ve been using the Dyson Supersonic Hair Dryer. A pretty penny for sure, but it’s so worth it. I’ve honestly never been more excited to talk about a blow dryer (and remember, #notsponsored). Leave it to Dyson to reinvent the proverbial blow drying wheel! This thing not only looks different, but the way it leaves my hair feeling is unlike any blow dryer I’ve ever used – silky and shiny, not dry and frizzy. Plus, it dries hair so quickly. It takes some getting used to because it feels so different than any old blow dryer. But now, I’m so attached to it that I take it everywhere – even hotels!
STEP 4: STYLE
It may seem obvious to some, but I just recently discovered that curling with a curling iron is probably the worst thing you can do for short hair. I will give a more detailed tutorial in the upcoming video, but the best way to curl or give your short that wave is with a flat iron. With this T3 straightener, I take small parts of my hair and twist them away from my face. I always leave an inch of the bottoms out to remain straight. This gives a less perfect curl and look.
STEP 5: SET
This may sound counteractive, but my go-to combination for setting my hair is to first spray with Oribe’s Texturizing Spray and then to polish off the ends with a little Ouai Finishing Oil.
But the real trick to getting perfectly tossed hair is to then sleep on all of this. I take this routine to my hair about twice a week, the other days are just leftovers from this. To give it a refresh, I use a dry shampoo like Klorane or Elizabeth and James’ Nirvana Bourbon.
OK, now your homework is to order the products! By the time they arrive, my styling video will be live and we can style together with the right products.
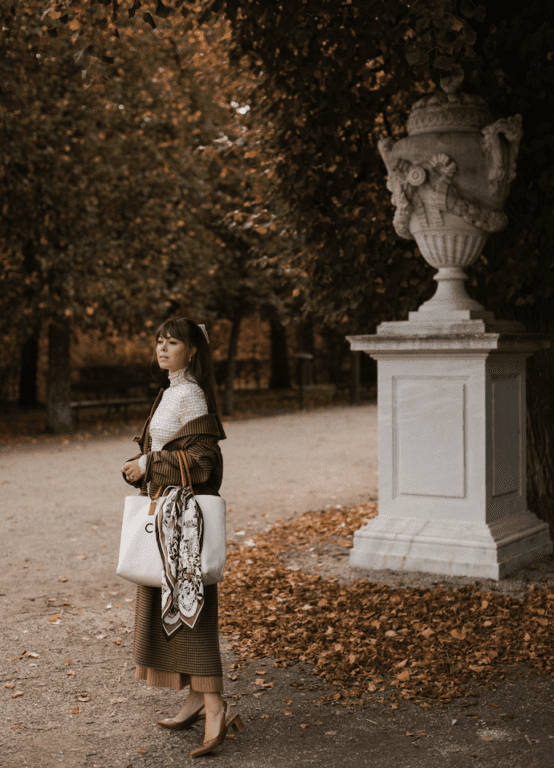
Photos by Cibele Levi